Thursday, December 15, 2016

Steering column

The epoxy on the interior was once more ground and Dinitrol 410 UV seam sealer was (tooth)brushed on the sheet metal seams before a layer of Temadur 50 in 'signal red' tone was sprayed to finish the red coating on inside roof and elsewhere. It seems to be very hard to find a modern formula for the tones of color. The paint resellers cannot match the Ditzler codes from the '60s to any of the formulas found in their databases. In '65 the the interior is bright red , but in '66 it turned to more dark maroon. I took a wild guess when accepting the 'signal red' without being able to compare it with the interior carpet or dash pad as I do not have them yet.


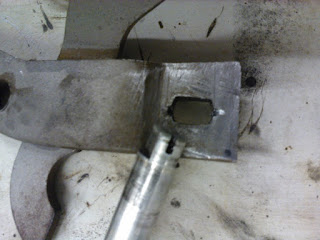
The steering column was disassembled and the tube was sanded and painted with the same color. During the disassembly I succeeded to break the wiring support that is placed inside the tube for keeping the wires not messing with the steering shaft. This support plate is not available as replacement so I had to design an additional reinforcing support for it.


The column collar is slid in place between the wire accesses


The connectors we pulled out through the opening

Holes were driller for the additional support

The support plate screwed in place

Wiring is in place

The hardware for securing the collar and turn signal assembly


Assembly positioned...


...and secured with square head screws

Ready for placing the collar

Maybe I regret it later but - as I only have limited amount of storage space especially for the reconditioned parts - I move on to installing the steering column and the under-the-dash components. The reasons for regrets might be that the tone of color is absolutely wrong and I'll have to re-paint the dash and column and the case of possible bad protection for over-spray during the painting of the body. To proceed with the steering column install calls for first installing the gasket and firewall pad which I re-manufactured from 30 mm sound insulator using the old one as a template. The insulator has adhesive surface on the other side so the button fasteners are not required but those will be added in places where the original holes still exist.


Steering column firewall gasket

Adhesive firewall insulator

Once the pad had been cut to fit and placed in the pedal assembly was positioned and bolted in as the steering column will be secured to dash with common stud bolts. The lower end of the column tube was painted black so the red will not be visible in the engine department.


Pedal assembly


End tip painted black

Tube end rubber went in first

The fresh air vent was cleaned and painted. In the below picture the operating knob bracket is upside down which I realized too late after the first pursuit to install. Easier to check first that rotate it under the dash.


Driver side fresh air vent

Steering column in place

Fresh air vent installed

Wednesday, November 30, 2016

November


Every now and then it comes to my mind that despite of hours spent in the shop nothing gets finished or done. Day after day you keep going to the shop until you cannot see the progress you've made with the project. So that's when you need to go back to your computer and take a look at the pictures to remind you that things actually have gone further. Here are a couple of miscellaneous shots of the past month.

Pedal assembly rebuilt
The doors epoxy primed
Trunk lid got some paint
Gas tank painted

The interior epoxy primed

Trunk lid test fit

Quarter vents disassembled and taken to soda blasters

More parts to the soda blasters

Quarter vents polished

Shock tower supports painted and assembled

Driver fender primed and painted

Splash shields installed

Test fitting the doors, hood and fenders

This morning when opening the garage door

Hood, hinges and engine bay finished

So a lot has been accomplished but some more time will have to be spent with the sheet metal. I already had thought that I wouldn't be needing the welding machine any more with this project. The gap between the driver door and fender cannot be adjusted so most likely I'll have to level the gap by welding more stuff on the edge of the door. As can seen in the below picture the contours of the door do not meet the shape of the rear edge of the fender.

This area will need welding

You just have to accept that this kind of setbacks sometimes occur. I am still aiming for having the body parts fit before the end of the year.

Update December 1st

After a couple of more pursuits, some bending and persuation I am convinced that no welding is needed.


Monday, November 14, 2016

Pedal assembly

In between all the grinding and priming sometimes you want to feel like getting something finished. In addition to that, I'll soon be ready to install the steering column (once it has been reconditioned) and that can only be done after the pedal assembly has been installed. The bushings on the assembly looked quite tired so I ordered a Master Rebuild Kit from a local dealer. As order for a new brake light switch was set as well because the old one had been there during the sandblasting and I did not bother to check whether it was working or not.
Pedal assembly

The disassemble is quite straight forward except for the heavy clutch spring. I did not do it like this but later figured out that the easiest way is to push the clutch pedal forward, then to remove the stopper and move the pedal back and the spring is loosened and easy to remove. I did the removal by pulling the axle outwards until the clutch pedal could be moved so much forward that the spring got loose.

Remove the clutch pedal stopper to ease the removal of the spring

The clutch pedal is attached to the axle with punched locking wedge that has to be ground or, like in my case drilled off before the axle can be detached.


The wedge in the axle ties the axle to the pedal

The axle drilled and punched off the pedal

While waiting for the repair kit the parts were cleaned and painted. Maybe too early for the assembly itself as the kit has roller bearings instead of bushings and the bushing housings need to be cut off.


Bushing housings cut off

The Scott Drake kit comes with roller bearings and wavy washers which are to be installed from the inside and large washers from the outside. Then the axle may be pressed in to ensure correct line. The bearing housing is secured with O-ring clips. I decided to opt to weld the large washers to the assembly. Then the new axle was welded on the clutch pedal. I did not pay too much attention to the remaining distance from the pedal to the groove on the other end of the axle and had to pay extra time fitting the axle locking washer and pin to the other end. Note what happened with the first washer when the pin was pressed in. So it is important to check that the washer and the pin will fit before welding the axle to the clutch pedal.

Test fitting

Secured with the clip. The pin hole too close to the bearing.

Large washer welded and the assembly repainted

Brake pedal with new bushings

New axle welded in the clutch pedal

Axle passing brake pedal

First washer got hurt

The second one succeeded better

The plastic insulator of the clutch spring

The easier way to install the spring.

Clutch stopper back in

Brake light switches, bushings and the shaft

The first bushing ring

'Then the shaft, switch and the second bushing

The third bushing and the pin

Clutch rod with the new brass bushings. Old nylon on the left

The hole on the pedal was enlarged to 13 mm.

The pad had to be replaced.

The final result

Ready to be installed

I like the new feel of the pedals. They feel snug but still easy to operate. In this application the bearings only apply for the clutch operation while the brake pedal goes with bushings and grease. For automatic transmission I would drill a hole through the brake pedal axle housing and the axle and secure them together with a screw to take full benefit of the bearings. This job was well worth the cost and effort while I was at it anyhow.

I also like the color I chose to make it easier to see things when working under the dash. I think the concours correct color is typical Ford's no-color-at-all or 'natural finish' .